...
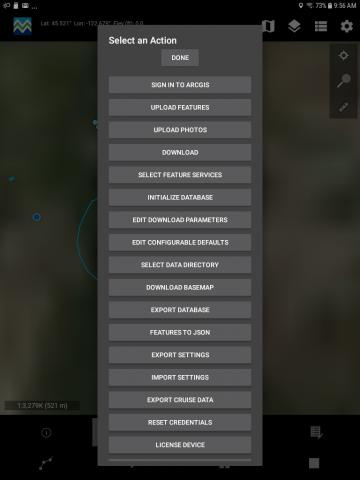
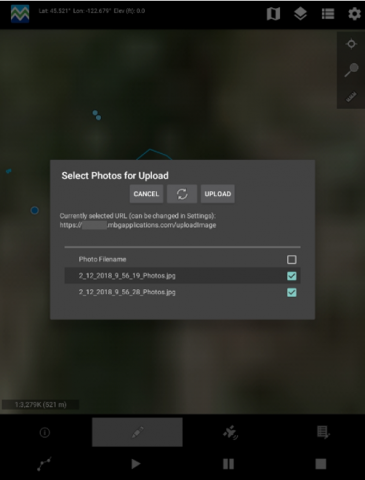
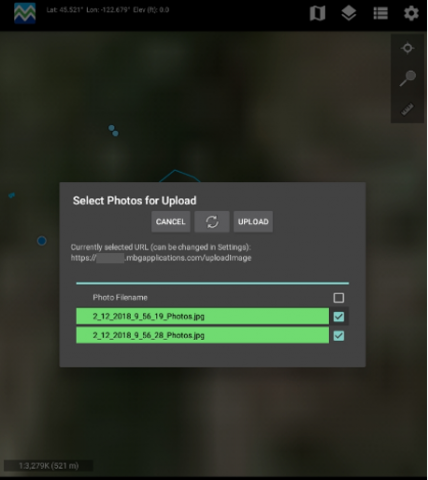
To upload photos, select ‘Upload Photos’ from that Actions menu in MobileMap. Select the photos you want to upload then tap ‘UPLOAD’. You will see a progress bar advance and each filename will turn green when done. If uploading just some of the photos, tap the refresh tool when done to see the list updated to show only those photos which photos have not been uploaded.


Once photos have been uploaded, you should be able to log into InventoryManager or your organization’s Spatial CMS and review these photos. To verify that a photo has been uploaded, make sure that the photo’s associated feature has been uploaded (MobileMap > Actions > Upload Features), then search for or click on the feature in InventoryManager or your organization’s Spatial CMS. Typically there will be a photo panel on either side of the map, or in the tabbed tools interface in the upper left of the page. When a feature that contains photos is clicked, all photos for that feature will be displayed in the photos carousel within the photos panel. Use the left and right arrow buttons to navigate through the set of all photos for the selected feature.